From Drizzle to Fluffy Frosting: Your Ultimate Guide to Versatile Chocolate Ganache
Chocolate ganache. The mere mention conjures images of glossy glazes, rich cake fillings, and decadent truffles. This humble yet incredibly versatile confection has captivated dessert lovers for centuries, transforming from a simple blend of chocolate and cream into a culinary chameleon that elevates any sweet treat. If you've ever wondered
how to make chocolate ganache that's consistently silky, glossy, and perfectly suited for any application, you've come to the right place. Far from being a complicated patisserie secret, ganache is surprisingly easy to master, requiring just a few quality ingredients and a handful of straightforward steps.
The Magic Trio: Understanding Your Ganache Ingredients
At its heart, classic chocolate ganache is a beautiful emulsion of just two or three core ingredients. Each plays a vital role in creating that signature smooth, luxurious texture and rich flavor.
The Star Players: Milk & Dark Chocolate
The type of chocolate you choose significantly impacts your ganache's flavor profile and final consistency. A common and highly recommended approach for balanced ganache is to use a blend of both milk and dark chocolate.
*
Milk Chocolate: This brings a delightful sweetness and a creamy richness to the ganache. Its higher sugar content contributes to a softer set and a melt-in-your-mouth feel.
*
Dark Chocolate: Essential for adding depth of flavor, a sophisticated slight bitterness, and that coveted glossy sheen. The higher cocoa content in dark chocolate (often 70% or higher is recommended) helps to balance the sweetness of the milk chocolate and provides structural integrity, allowing the ganache to set beautifully without becoming overly hard. The cocoa butter in dark chocolate is key to achieving that beautiful, reflective finish. While a blend offers a harmonious balance, don't hesitate to experiment! If you prefer a more intense, less sweet ganache, using all dark chocolate is a perfectly delicious option.
For an even deeper dive into how these chocolate types interact and the ideal ratios for achieving that perfect gloss, explore
The Secret to Glossy Ganache: Dark & Milk Chocolate & Cream Ratio.
The Creamy Foundation: Double Cream (Heavy Cream)
The final essential ingredient is high-fat cream. In the UK, this is typically 'double cream,' while in the US, it's known as 'heavy cream.' What makes it so crucial?
*
High Fat Content: Double cream boasts around 48% fat, which is the secret to ganache's incredibly luxurious texture and rich, velvety taste. This fat is essential for the emulsification process.
*
Emulsification: The fat from the cream combines with the cocoa butter in the chocolate, creating a stable, smooth emulsion. This prevents the ganache from becoming grainy or splitting and ensures it sets with a desirable, not-too-hard texture – perfect for everything from drizzling to whipping.
While many traditional recipes call for a 1:1 ratio of chocolate to cream, slightly increasing the cream can result in an even silkier, more pourable ganache. This slight adjustment allows for greater flexibility in application without compromising richness. A tiny pinch of salt can also be added to enhance the chocolate's flavor, making it even more irresistible.
Mastering the Method: Your Step-by-Step Guide to Perfect Ganache
Creating perfect chocolate ganache is less about intricate techniques and more about patience and attention to detail. Follow these steps to ensure a consistently smooth, glossy, and stable result every time.
Prep Work: The Finer Points of Chopping Chocolate
Your journey to luscious ganache begins with the chocolate. Finely chopping both your milk and dark chocolate is a critical, often overlooked, step.
*
Even Melting: The smaller and more uniform your chocolate pieces, the faster and more evenly they will melt. This prevents scorching and ensures a smooth, lump-free ganache. Large chunks will struggle to melt completely, leaving you with an inconsistent texture.
*
Bowl Selection: Once chopped, place the chocolate in a heatproof glass or ceramic bowl. This material retains heat well, aiding in the melting process.
Gentle Heat: Warming the Cream Just Right
The temperature of your cream is paramount. Too cold, and it won't melt the chocolate properly; too hot, and you risk scorching the cream and splitting your ganache.
*
Slow and Steady: Pour your double cream (heavy cream) into a small saucepan and heat it gently over medium-low heat. Do not rush this step.
*
Signs of Readiness: Look for small bubbles forming around the edge of the pan and visible steam rising from the surface. The cream should be piping hot, but *never* boiling rapidly. Boiling cream can cause it to scorch, impart an off-flavor, and significantly increase the risk of your ganache seizing or splitting.
The Fusion: Pouring, Resting, and Emulsifying
This is where the magic truly begins. The controlled introduction of hot cream to chopped chocolate is key to a stable emulsion.
*
Cover and Rest: Once the cream is steaming hot, immediately pour it directly over your finely chopped chocolate, ensuring all the chocolate is submerged. Crucially, cover the bowl with an upside-down plate or plastic wrap and let it sit undisturbed for one minute. This minute of rest allows the trapped heat to gently melt the chocolate, preparing it for stirring and resulting in a much smoother ganache.
*
The Stirring Technique: After the minute, remove the cover and begin to stir. Start slowly, using a spatula or spoon, from the center of the bowl and gradually work your way outwards in small, concentric circles.
*
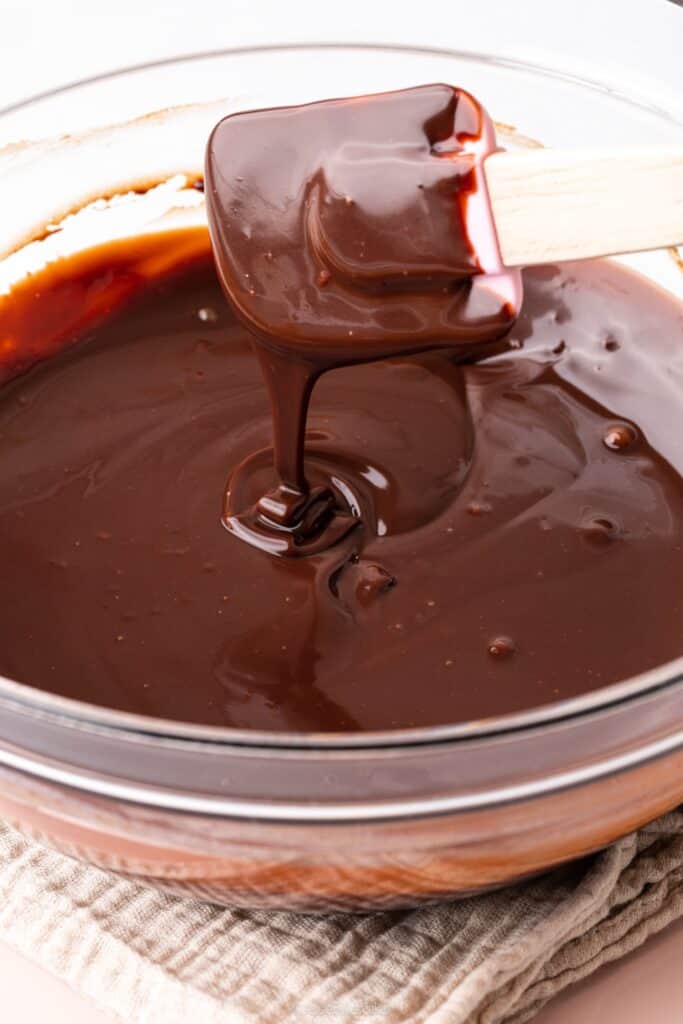
Be Patient: Initially, the mixture may look streaky, oily, or even appear to be "split." Do not panic! This is normal. Continue stirring slowly and steadily. As the chocolate and cream fully emulsify, the mixture will miraculously transform before your eyes into a glossy, smooth, and velvety ganache. This process typically takes a few minutes of consistent, gentle stirring. Avoid whisking too vigorously, as introducing too much air can impact the final texture.
For a detailed recipe and visual guide to perfecting this fundamental process, refer to
Master Silky Smooth Chocolate Ganache: Easy 3-Ingredient Recipe.
Beyond the Basics: Unlocking Ganache's Incredible Versatility
One of the most remarkable aspects of chocolate ganache is its chameleon-like ability to transform its consistency based on temperature, making it suitable for an astonishing array of dessert applications.
*
Warm and Pourable (Liquid Ganache): When freshly made and still warm, ganache is pourable and liquid. This consistency is ideal for creating stunning glazes over cakes, cupcakes, or donuts. It's also perfect for elegant chocolate drips on celebration cakes, or as a rich sauce for ice cream, crepes, or fresh fruit. You can also dunk fresh strawberries or marshmallows directly into warm ganache for an instant treat.
*
Cool and Spreadable (Soft Ganache): As ganache cools to room temperature, it thickens significantly, becoming soft, pliable, and spreadable. This consistency is perfect for filling cake layers, piping onto cupcakes as a luxurious frosting, or using as a rich filling for tarts, macarons, or eclairs. Its smooth texture makes it a dream to work with, holding its shape beautifully.
*
Chilled and Whippable (Whipped Ganache Frosting): Once chilled completely (typically several hours or overnight in the refrigerator), ganache becomes firm. At this stage, you can whip it with an electric mixer until it becomes light, airy, and fluffy, much like a traditional buttercream. This whipped ganache makes an exquisite, incredibly stable frosting for cakes and cupcakes, offering a lighter texture with all the intense chocolate flavor. You can also use it as a filling for chocolate pies or trifles, adding a sophisticated touch.
*
Firm and Formable (Truffle Base): With a higher chocolate-to-cream ratio (e.g., 2:1 or even 2.5:1), a chilled ganache can be firm enough to scoop, roll, and shape into decadent chocolate truffles, which can then be coated in cocoa powder, nuts, or sprinkles.
Tips for Ganache Success & Troubleshooting Common Issues
Even with a simple recipe, things can sometimes go awry. Here are some pro tips and solutions to common ganache problems:
Pro Tips for Perfect Ganache:
*
Quality Matters: Invest in good quality chocolate. Better chocolate equals better-tasting ganache.
*
Patience is a Virtue: Don't rush the cream heating or the stirring process. These steps are crucial for proper emulsification.
*
Consider the Environment: On hot days, your ganache might take longer to thicken. Conversely, in a cold kitchen, it may thicken more quickly. Adjust cooling times accordingly.
*
Storage: Store ganache in an airtight container in the refrigerator for up to a week. Reheat gently in a microwave (stirring frequently) or over a double boiler to restore a pourable consistency.
Troubleshooting Your Ganache:
*
Split/Greasy Ganache: This is a common issue, often due to the emulsion breaking, usually from overheating or over-stirring. Don't throw it out! Add a tablespoon of *hot* water, hot milk, or even hot cream to the mixture and whisk vigorously. Sometimes, gently reheating the ganache over a double boiler while whisking can bring it back together.
*
Lumpy Ganache: This usually means your chocolate wasn't chopped finely enough, or your cream wasn't hot enough to melt all the pieces. Gently rewarm the ganache over a double boiler (bain-marie) and continue stirring until smooth. A fine-mesh sieve can also help remove stubborn lumps if necessary.
*
Ganache Too Thick: If your ganache has set too firm for your desired application, gently warm it in 10-15 second intervals in the microwave, stirring well after each interval, until it reaches the desired consistency. Alternatively, place the bowl over a saucepan of simmering water (double boiler) and stir. You can also stir in a tablespoon of warm cream at a time to loosen it.
*
Ganache Too Thin: If your ganache is too runny, it might need more chocolate. Gently melt a small amount of extra chopped chocolate and stir it into the ganache until fully incorporated, then allow it to cool and thicken. For a temporary fix, chilling it in the refrigerator for 15-30 minute increments (stirring between each) can help it firm up.
Conclusion: Your Journey to Ganache Mastery
From a simple drizzle to the dreamiest frosting, understanding
how to make chocolate ganache opens up a world of dessert possibilities. With just a few quality ingredients and a little patience, you can consistently create this luxurious chocolate concoction, customizing its texture and application to suit any sweet craving or baking project. So, gather your chocolate and cream, embrace the process, and prepare to elevate your baked goods with the unparalleled richness and versatility of homemade chocolate ganache. Happy baking!